Application guide by addaScanCompare the inspection task, imaging conditions and validation steps with your own production line.
- Inspection task
- Blood-bag code and tray association
- Decision focus
- blood-bag code and tray association
- Station planning
- Resolve the object boundary before accepting identity
- Illustrative scenario
- one label extends into the neighbouring slot
Relate blood-bag code observations to tray positions
The application images show the physical product and imaging conditions. The engineering diagram below explains the inspection logic and recovery decisions.
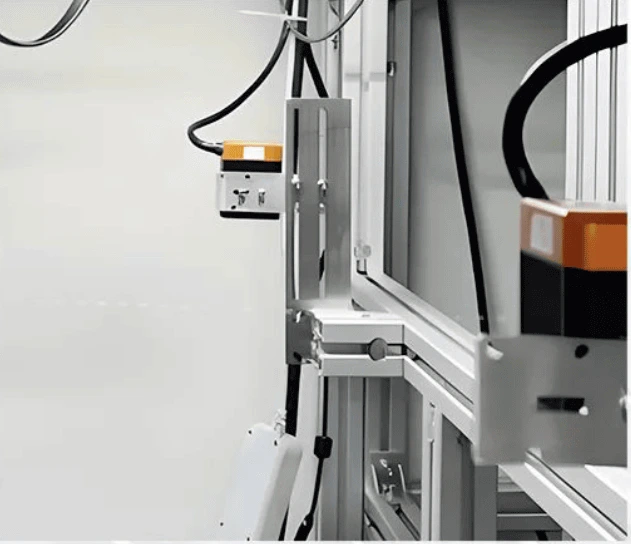
Camera and tray arrangement at the inspection station.
Select an image to view it at full size.
Associate each blood-bag code with its physical bag
Swipe across the table to compare all columns →
| Condition | Approach to evaluate | Selection check |
|---|---|---|
| Rigid tray, clear labels | Evaluate slot-based presence and code reading. | Test labels near slot boundaries. |
| Deformed bags | Evaluate bag localisation with code-to-object association. | Challenge folded and overlapping labels. |
| Structured output | Send position, identity and state together. | Preserve empty, unreadable and duplicate states. |
Resolve the object boundary before accepting identity
Locate the tray, then identify the occupied bag regions. Associate a code using its location on the visible label and bag, while checking the expected position map. Keep ambiguous cross-boundary labels unresolved. A bag can carry more than one symbol, so the recipe also needs the required code type or content rule; decoding every visible string does not establish which one is the primary identity.
A fixed reader may be sufficient when handling presents one known label at a time. A wider camera system can support bag segmentation and coordinate association, but uncertainty increases where bags overlap. Mechanical separation or a sequential read is preferable when the image cannot establish which bag owns a label.
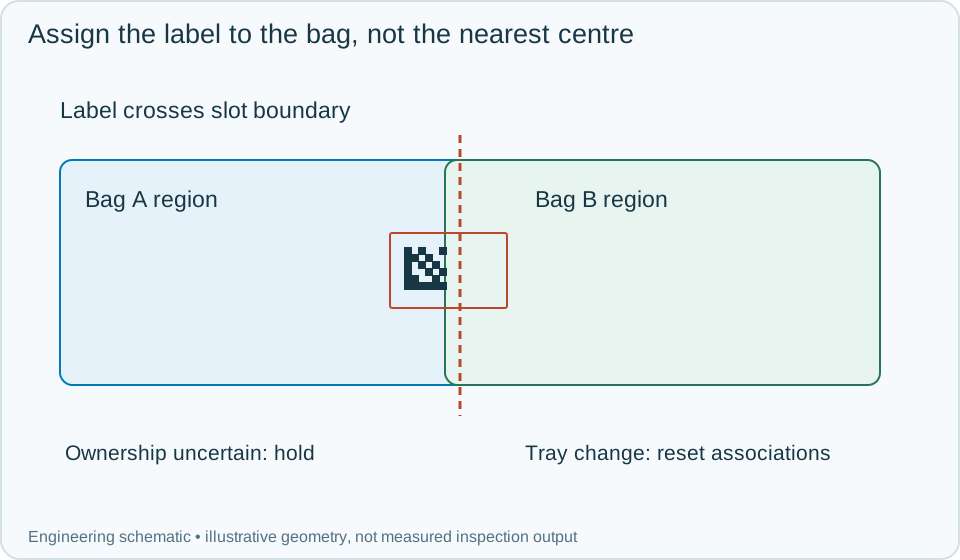
On a small screen, scroll across the diagram to inspect the labels.
Worked example: one label extends into the neighbouring slot
In an illustrative tray, bag A occupies its expected region but its label lies closer to slot B's centre. A nearest-centre rule would bind A's code to B. Use the visible bag-label relationship and tray map; if that relationship is obscured, hold the association and re-present the bags.
A second bag is present without an accepted read. Preserve it as occupied-unread rather than an empty slot. If one bag supplies two conflicting primary identities, flag the conflict for controlled review. After repositioning, reread under the same tray event and retain the earlier candidates. A late image from the previous tray must never populate the current tray's unresolved position. Complete the tray only after occupancy, required identities, uniqueness and binding rules are all resolved.
Swipe across the table to compare all columns →
| Observed evidence | Inspection decision | Action and retained record |
|---|---|---|
| A bag label lies closer to another slot centre than to its own occupied region. | Nearest-centre association is insufficient. | Use visible bag-label ownership or hold the relationship, retain candidate regions and reread after controlled re-presentation under the same tray event. |
| A bag is present without a required primary-code read. | Occupied-unread, not an empty tray position. | Keep occupancy and identity separate, direct recovery to that bag and require a resolved accepted identity before completing the tray. |
| One bag supplies conflicting primary identities or a previous tray's result arrives late. | Conflict or stale association blocks automatic completion. | Preserve candidate images and tray events, reconcile the identity and prevent old results populating the current tray's unresolved positions. |
Test association errors independently of read quality
Challenge labels across slot boundaries, overlapping bags, multiple symbols, occupied unread positions and tray replacement during retries. Retain the full tray image, bag regions, selected code locations, discarded candidates and final association table.
The vision record supports identity and position handling. It does not infer clinical suitability or sample properties from bag appearance. Any manual correction must preserve the original observation and identify the authorised change, so downstream users can reconstruct how the final tray map was established.
Swipe across the table to compare all columns →
| Challenge | What to verify |
|---|---|
| Empty slot beside occupied slot | Verify the row/column mapping. |
| Folded bag with displaced label | Check code association to the correct item. |
| Two visible codes on one bag | Apply the specified code-selection rule. |
| Unreadable label | Keep the occupied slot in the result with an exception state. |
Bag labels and tray-position rules to provide
Provide tray layouts, actual bag presentations, label formats and the receiving system’s required output structure.
Use the barcode verification grading guide to develop the next step.
Translate these view and interface requirements into equipment choices with code reader selection.
Define the wider inspection responsibility in presence counting.
Use the optical and recovery challenges above when applying the architecture choices in vision-system comparison guide.
Scope and budget
The vision system cost guide explains general code-reading and association factors; bag handling and receiving-system requirements need a specific scope.
Testing and handover
Use the testing and handover process to test labels crossing slot boundaries and ensure uncertain associations are held for resolution.