Application guide by addaScanCompare the inspection task, imaging conditions and validation steps with your own production line.
- Inspection task
- Soaked-chip code reading and ordering
- Decision focus
- soaked-chip code reading and ordering
- Station planning
- Establish the position map before combining exposures
- Illustrative scenario
- the eighth position resolves after a second exposure
Blue-light imaging and ordered chip-code results
The application images show the physical product and imaging conditions. The engineering diagram below explains the inspection logic and recovery decisions.
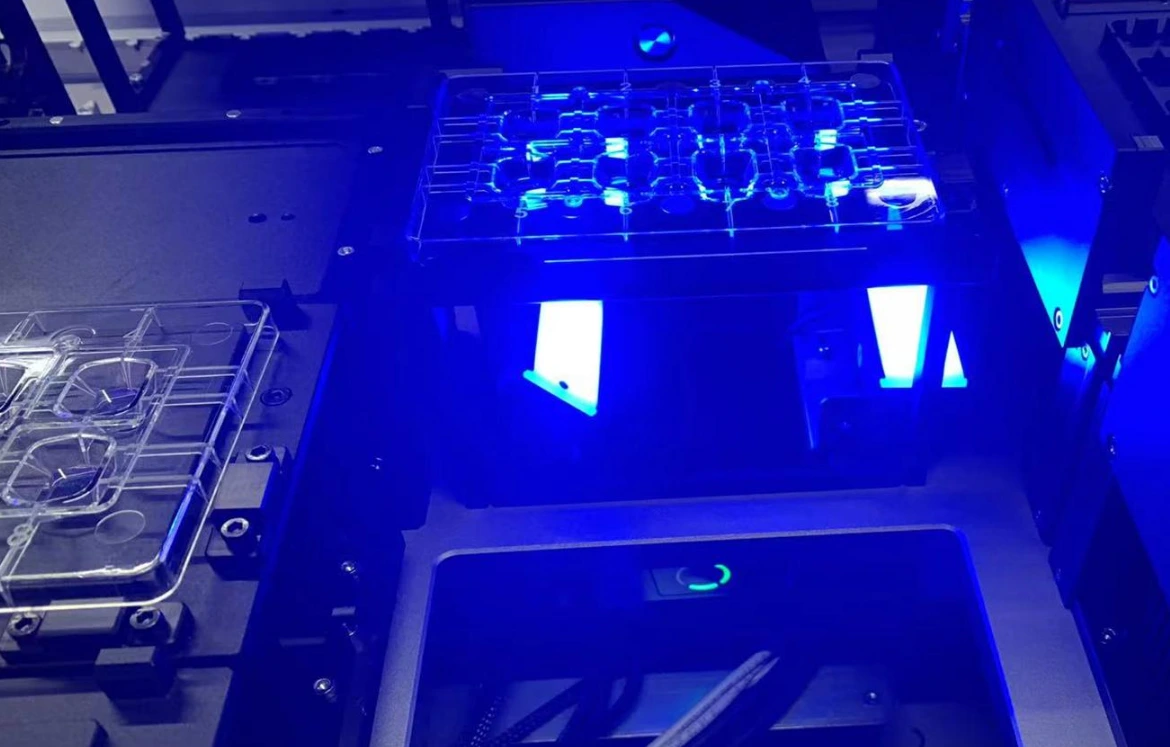
Original imaging arrangement for the soaked-chip tray.
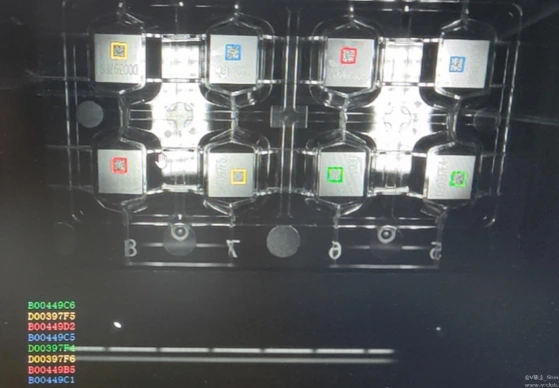
Original code detections and output list from the application.
Select an image to view it at full size.
Return chip identities in fixture order, not discovery order
Swipe across the table to compare all columns →
| Condition | Approach to evaluate | Selection check |
|---|---|---|
| Single frame | Evaluate the best repeatable image first. | Identify positions lost to reflection. |
| Multi-frame acquisition | Combine valid reads within one tray event. | Prevent stale reads from an earlier tray. |
| Ordered output | Map each read to a defined position. | Challenge reversed trays and absent chips. |
Establish the position map before combining exposures
Locate the fixture and resolve its orientation. Assign the expected positions a fixed output order, then associate each decoded symbol using its image location. A reversed fixture needs a verified coordinate transform; reversing a string list after decoding is not a substitute for locating it.
First improve the optical arrangement to reduce unstable reflections. Additional exposures can recover complementary views, but increase acquisition time and introduce association work. Keep exposure number, fixture event and location with every candidate. Merge repeated observations of the same code at the same position; preserve a conflict if a position yields different strings. A conflicting observation should not be discarded simply because another exposure has a higher score.
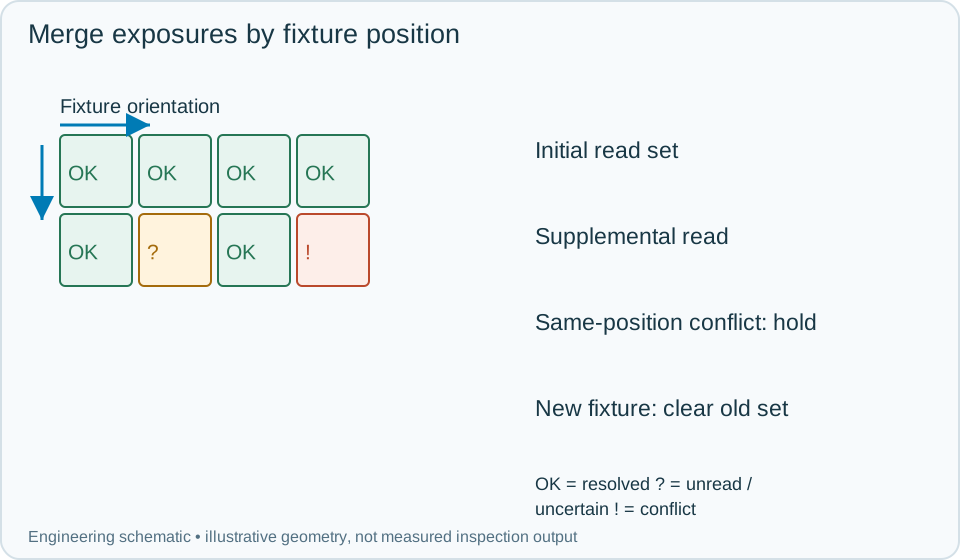
On a small screen, scroll across the diagram to inspect the labels.
Worked example: the eighth position resolves after a second exposure
In an illustrative eight-position fixture, the first frame resolves all but one position. The second resolves the remaining code and repeats several others. Because the fixture event and pose remain valid, merge the new position and deduplicate identical observations at already resolved positions. Output the complete set in fixture order only after the required identity checks pass.
If the second frame instead returns a different code for an occupied position, hold the set and investigate location, reflection or actual part movement. If the tray has changed, discard the second frame from the old event's merge and start a clean map. Preserve both candidate images for review. A physically unresolved position remains unresolved even if the raw combined read count reaches eight.
Swipe across the table to compare all columns →
| Observed evidence | Inspection decision | Action and retained record |
|---|---|---|
| A second exposure returns the same string at an already resolved fixture position. | Repeated observation under one fixture event. | Deduplicate that position while retaining exposure history; do not add another identity or change output order because the code was found again. |
| Two exposures return different strings at the same physical position. | Identity conflict remains unresolved. | Keep both image crops and fixture transform, hold the set and investigate movement or association before an authorised resolution. |
| A supplemental frame arrives after the next tray is loaded. | Old frame cannot supplement the new set. | Close the former fixture event, discard the stale merge and require every position of the new fixture to resolve independently. |
Verify the wet-state and restart behaviour
Challenge surface-film variation, angled reflections, reversed fixtures, missing codes and a stop between exposures. Record the position map, exposure history, conflicts, final ordered set and handling decision. Define a maximum acquisition window from the actual machine timing; an indefinite retry loop can collide with the next fixture.
A multi-code reader and a PC-based system should be compared on the same complete-set and ordering tests. More processing flexibility is useful only if the event ownership and fixture mapping remain reliable through retries and changeovers.
Swipe across the table to compare all columns →
| Challenge | What to verify |
|---|---|
| Different soaking conditions | Evaluate every chip position. |
| One missing or unreadable chip | Keep the tray incomplete and identify the position. |
| Repeated code value | Apply the agreed uniqueness rule. |
| Tray removed between frames | Abort or restart the event without mixing records. |
Wet-state samples and fixture ordering rules
Provide trays, chip codes, soaking variations, required ordering, duplicate rules and the trigger/acknowledgement interface.
Use the barcode verification grading guide to develop the next step.
Translate these view and interface requirements into equipment choices with code reader selection.
Define the wider inspection responsibility in dpm code reading.
Use the optical and recovery challenges above when applying the architecture choices in vision-system comparison guide.
Scope and budget
Use the vision system cost guide for general optical and interface factors; wet-state handling and fixture-order validation require a separate scope.
Testing and handover
The testing and handover process should verify that supplemental exposures remain tied to the same fixture and position map.