Application guide by addaScanCompare the inspection task, imaging conditions and validation steps with your own production line.
- Inspection task
- Shrink-wrap code reading
- Decision focus
- shrink-wrap code reading
- Station planning
- Choose illumination by what happens to the missing stroke
- Illustrative scenario
- the final digit disappears
Code visibility through reflective shrink-wrap
The application images show the physical product and imaging conditions. The engineering diagram below explains the inspection logic and recovery decisions.
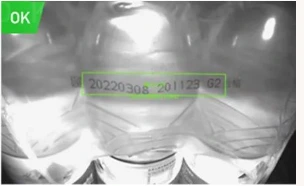
Selected reading view from the wrapped-bottle application; the original recognition overlay is retained.
Select an image to view it at full size.
Separate shrink-film glare from damaged printing
Swipe across the table to compare all columns →
| Condition | Approach to evaluate | Selection check |
|---|---|---|
| Stable flat film | Evaluate conventional OCR or decoding. | Check acceptable low-contrast samples, not just the best print. |
| Moving highlights | Evaluate diffusion, angle and polarisation. | Check that glare suppression does not remove useful contrast. |
| Strong character distortion | Evaluate a trained recogniser after improving the image. | Keep a separate set of unseen folds and print variations. |
Choose illumination by what happens to the missing stroke
Diffuse light can soften broad reflections; a changed viewing angle can move a specular highlight away from the code. Polarisation is another candidate, but its loss of light must be tested against exposure time and product motion. Compare full-resolution crops of the same code rather than judging only the decoder's success flag.
A stroke that reappears when the highlight moves was optically hidden. A stroke absent across usable views may be a print defect. A fold covering part of the code creates a geometric blind area: first consider guiding the pack, moving the inspection before shrink wrapping or using another view. A more capable recognition tool cannot establish the content of a character that is never visible.
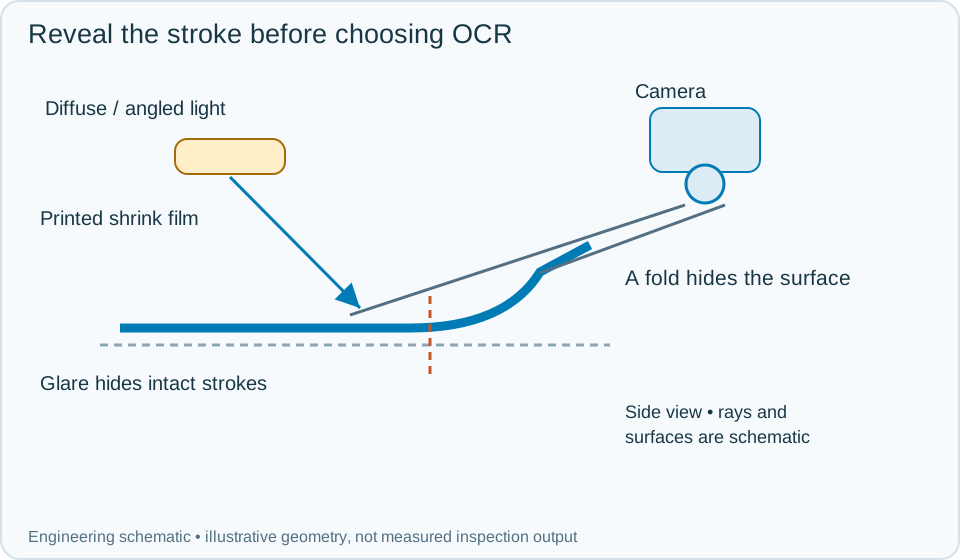
On a small screen, scroll across the diagram to inspect the labels.
Worked example: the final digit disappears
An illustrative pack gives a no-read at the end of a date line. Under the original light, the final digit lies in a bright band. Changing the illumination angle reveals a complete digit, so the first failure is classified as glare. Retest the chosen setup with the pack moving before accepting it.
A second pack has a sharp, well-exposed image but the digit remains broken. Evaluate that local print against the completeness rule even if OCR guesses the expected date. A third has the last digit under a fold in every permitted view. Mark it uninspectable and hold or divert it; do not treat the expected date as an observed result. Store the image and distinct reason for each decision, then confirm the physical reject or recheck outcome against the pack event.
Swipe across the table to compare all columns →
| Observed evidence | Inspection decision | Action and retained record |
|---|---|---|
| A character reappears when the highlight moves, while the package and printed region remain registered. | Optical visibility recovered; content still needs verification. | Retain both light views and the moving-image trial. Accept only after the observed content and any required print rule pass. |
| A stroke remains absent in a sharp, fully exposed print region across qualified light views. | Visible print fault, even if OCR supplies the expected string. | Reject the identified pack, retain the local stroke evidence and verify its removal. Investigate printing separately from lighting. |
| A fold covers a required character in every permitted view. | Content unavailable; do not infer the expected value. | Hold or divert for controlled re-presentation. Record the hidden region and preserve the original event through any reread. |
Challenge the pack geometry at the inspection point
Include tight and loose film, approved seam positions, wrinkles across different characters and normal print variation. Repeat the trial after the film has cooled if the station is downstream of the tunnel. Validate the full range of pack heights and conveyor positions, since a lighting arrangement that removes glare at the centre may shift it onto an edge code.
Keep optical no-reads separate from content mismatches and genuine print faults in production reports. This lets maintenance adjust lighting without masking a printer problem or widening the accepted date rules.
Swipe across the table to compare all columns →
| Challenge | What to verify |
|---|---|
| Tight and loose wrap | Confirm that the same field stays readable across film tension. |
| Wrinkle through a character | Record no-reads separately from incorrect strings. |
| Correctly read old batch | Confirm the expected-content comparison rejects it. |
| Two multipacks close together | Keep each result associated with the correct pack. |
Wrap, glare and code samples to test
Use the bottling and canning guide to position this pack-code check alongside bottle handling and secondary packaging.
Provide wrapped production samples, the smallest characters, printer settings, film variants, pack spacing and the expected batch-data source.
Use the label verification sop guide to develop the next step.
Define the wider inspection responsibility in ocr ocv code inspection.
Develop the related acceptance requirements with multipack inspection.
Use the optical and recovery challenges above when applying the architecture choices in vision-system comparison guide.
Scope and budget
Review film glare, multiple pack views and reject tracking against the multipack inspection scope and cost factors.
Testing and handover
Include wrap changes and an unreadable pack between readable packs in the testing and handover process.