Application guide by addaScanCompare the inspection task, imaging conditions and validation steps with your own production line.
- Inspection task
- Cap liner presence and orientation
- Decision focus
- cap liner presence and orientation
- Station planning
- Build references from both faces and the seating geometry
- Illustrative scenario
- a bright liner is partly lifted
Locate the liner and distinguish its visible orientation
The application images show the physical product and imaging conditions. The engineering diagram below explains the inspection logic and recovery decisions.
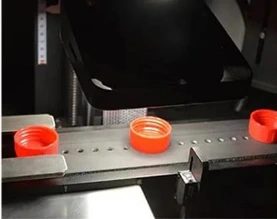
Installation detail from the cap-liner application.
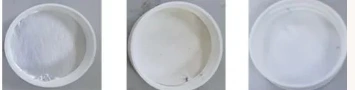
Selected cap interiors for comparison; the classification rules are explained in the article.
Select an image to view it at full size.
Separate liner absence from the wrong liner face
Swipe across the table to compare all columns →
| Condition | Approach to evaluate | Selection check |
|---|---|---|
| Only liner presence matters | Compare the cap interior with an empty-cap reference. | This does not establish face orientation. |
| Fluorescent face is the reference | Evaluate illumination matched to the material response. | Challenge ageing, contamination and acceptable batch variation. |
| Several dispositions are required | Use distinct state outputs and tracked handling. | Verify that each state reaches the intended physical route. |
Build references from both faces and the seating geometry
Inspect matched front and reverse faces from the same material batch before comparing different batches. Check the cap without a liner as well: a reflective cap interior can otherwise be mistaken for the intended signal. Locate the cap and evaluate liner coverage or contour separately from fluorescence. A bright fragment is not proof of a complete seated liner.
Shield the station from variable ambient light and verify the illumination and filter arrangement. A batch with weaker fluorescence can remain correctly oriented; lowering a threshold without reverse-face samples may erase the separation. If the front and reverse distributions overlap under normal conditions, evaluate another visible feature or a different sensing arrangement instead of forcing a binary brightness decision.
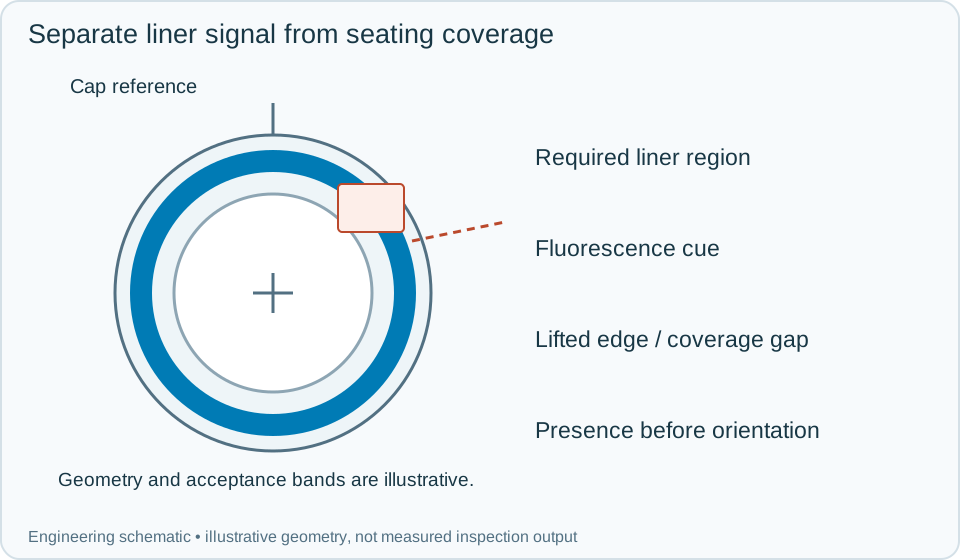
On a small screen, scroll across the diagram to inspect the labels.
Worked example: a bright liner is partly lifted
An illustrative cap gives the expected fluorescence but an incomplete circular seating pattern. Orientation evidence is acceptable; seating evidence is not. Hold the cap with a seating-fault result and retain both the intensity region and contour evidence. A cap with no liner should fail presence before orientation is evaluated.
Next, a correctly seated liner from a new batch gives an intermediate signal. Compare it with approved front and reverse samples under the same setup. Until that separation is established, return orientation uncertain and segregate the cap for controlled review. After the recipe is qualified, repeat the inspection on identified samples and preserve the original uncertain attempt. Do not release a cap simply because a later cap from the batch produced a stronger signal.
Swipe across the table to compare all columns →
| Observed evidence | Inspection decision | Action and retained record |
|---|---|---|
| The expected fluorescence is present but the liner coverage has a lifted or missing segment. | Orientation evidence passes; seating or completeness fails. | Retain the signal region and contour separately. Reject the cap and confirm the physical result without collapsing it into a colour failure. |
| A fully seated new-batch liner gives overlapping signals for its front and reverse faces. | Orientation criterion is not qualified for that batch. | Hold the affected caps, compare matched face samples and qualify another feature or optical arrangement before changing the recipe. |
| The cap interior is visible but no complete liner region is present. | Liner absence; orientation is not applicable. | Record the cap location and missing-liner region, execute the assigned reject action and keep absence separate from uncertain fluorescence. |
Check that material drift cannot become a silent recipe change
Validate full seating, lifted edges, absent liners, reversed liners and normal material variation. Record illumination settings, material lot where available, geometric coverage and orientation evidence. A recurring shift across good samples should prompt a controlled setup check, including lens-window contamination and illumination ageing.
A top view can confirm only features visible from that direction. If a required seating or fold condition is hidden beneath the liner, add the appropriate view or process check rather than extending a presence claim into an unobserved assembly guarantee.
Swipe across the table to compare all columns →
| Challenge | What to verify |
|---|---|
| Empty cap | Confirm a missing-liner result. |
| Reversed liner | Reject despite material being present. |
| Correct liner with brightness variation | Measure false rejects across normal batches. |
| Partly seated or contaminated insert | Define its disposition rather than forcing it into a good state. |
Liner variants and cap positions to test
The plastics and packaging guide provides the wider closure-manufacturing context; select liner acceptance rules for the actual cap and its intended use.
Provide both liner faces, empty caps, seating faults, normal material variation and the required output for each state.
Use the visual seal inspection vs leak testing guide to develop the next step.
Define the wider inspection responsibility in fill cap seal inspection.
Develop the related acceptance requirements with assembly verification.
Use the optical and recovery challenges above when applying the architecture choices in vision-system comparison guide.
Scope and budget
Compare the views of the liner, seating checks and cap-handling constraints in the closure inspection system scope and cost factors.
Testing and handover
Include a reversed liner, a missing liner and an uncertain seat in the testing and handover process; seal performance needs its own test.