Application guide by addaScanCompare the inspection task, imaging conditions and validation steps with your own production line.
- Inspection task
- Beverage fill-level inspection
- Decision focus
- beverage fill-level inspection
- Station planning
- Use a bottle reference that survives the product change
- Illustrative scenario
- a full bottle appears underfilled
Find the liquid boundary in the presented bottle
The application images show the physical product and imaging conditions. The engineering diagram below explains the inspection logic and recovery decisions.
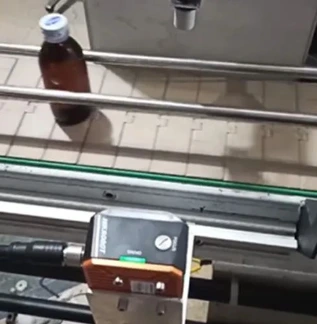
Camera arrangement on the beverage line.
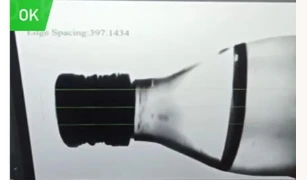
The OK view illustrates a visible liquid boundary in the imaged bottle.
Select an image to view it at full size.
Find the liquid boundary before judging the fill
Swipe across the table to compare all columns →
| Condition | Approach to evaluate | Selection check |
|---|---|---|
| Clear wall and distinct liquid boundary | Evaluate transmitted or backlighting. | Confirm the edge remains distinct on moving bottles. |
| Foam or several visible layers | Define which boundary determines acceptance. | Challenge settling-time changes and ambiguous edges. |
| Opaque wall or fully covering label | Assess another view or a non-visual fill measurement. | Do not infer a hidden boundary from bottle presence. |
Use a bottle reference that survives the product change
Locate the bottle before searching for the liquid edge. A visible neck or shoulder can provide a reference, but a shoulder moulding that changes between bottle families needs a different recipe. Measuring directly from the image border confuses conveyor movement with a change in fill. Check both sides of the bottle: a sloping candidate boundary can indicate tilt, whereas a foam band may provide several competing edges.
Backlighting is worth evaluating on translucent containers because it can reveal the product boundary without relying on front-surface shine. An opaque label across the fill window can remove that evidence entirely. Moving the camera to an uncovered window or inspecting before labelling may resolve this; training another classifier cannot reveal liquid behind an opaque label. A checkweigher answers a different question when the requirement is net mass.
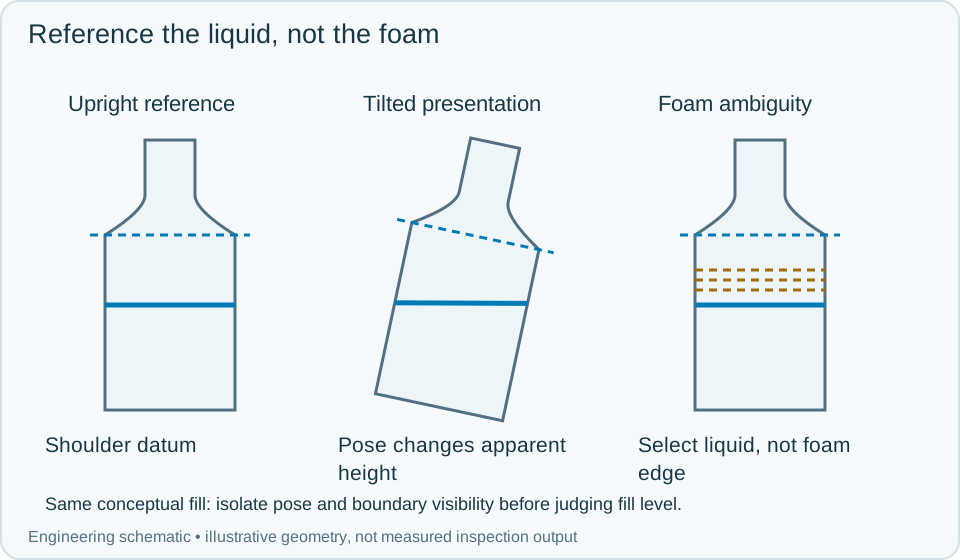
On a small screen, scroll across the diagram to inspect the labels.
Worked example: a full bottle appears underfilled
Consider an illustrative sequence after a foamy product change. The first image contains a strong foam edge and a weaker liquid edge. The bottle reference is valid, but the selected edge changes between successive images. Do not average those heights into a confident fill result. Record an ambiguous-boundary result and hold the bottle or route it through the agreed recheck process.
At a downstream position, after an agreed settling interval, repeat the image under the same recipe. If the actual liquid boundary becomes stable, compare it with the permitted band relative to the bottle reference. If the bottle is tilted, correct its presentation and repeat; a pose correction in software is useful only within validated limits. A persistently low liquid boundary on a valid upright view is an underfill decision. Keep the first image, recheck image and final disposition attached to the same bottle event.
Swipe across the table to compare all columns →
| Observed evidence | Inspection decision | Action and retained record |
|---|---|---|
| Bottle reference is valid but foam and liquid edges compete between images. | Boundary ambiguous; no reliable fill measurement yet. | Store both candidate edges and settling position. Recheck the same bottle downstream or hold it according to the qualified process. |
| An upright bottle has a stable liquid edge below its recipe-relative permitted band. | Visible underfill decision within the qualified geometry. | Keep the bottle reference, measured edge and recipe, then confirm rejection. Do not present this alone as a calibrated net-mass result. |
| The label or opaque wall hides the entire required liquid window. | Optical fill evidence unavailable. | Record the coverage failure. Change the view or process point, or assign the requirement to an appropriate alternative measurement. |
Separate a filling fault from an unavailable measurement
Challenge the station with upright and tilted bottles of the same fill, foam that settles at different rates, label-position variation and each bottle family. The expected outcome differs: tilt can invalidate geometry, foam can delay visibility, and a genuinely low boundary can justify rejection. Record which boundary was used and whether the reference was accepted so maintenance can reproduce a false reject.
A visible-height result does not establish net contents without a validated relationship to container geometry and product conditions. If the reject confirmation is missing, stop or contain the affected flow according to the line design; receiving an underfill result is not proof that the bottle left the accepted stream.
Swipe across the table to compare all columns →
| Challenge | What to verify |
|---|---|
| Low and high challenge bottles | Check both sides of the acceptance window. |
| Normal bottle-height variation | Verify the product reference compensation. |
| Foam, bubbles and slosh | Separate ambiguous measurements from true fill faults. |
| Conveyor restart | Check settling and trigger timing before releasing product. |
Bottle shapes and fill conditions to provide
The bottling and canning guide connects the visible fill check with container handling, closure and downstream packing.
Provide bottle drawings, label coverage, liquid optical properties, normal foam, line motion and the agreed fill criterion.
Use the fill level inspection camera x ray high frequency guide to develop the next step.
Define the wider inspection responsibility in fill cap seal inspection.
Develop the related acceptance requirements with bottled water line inspection.
Use the optical and recovery challenges above when applying the architecture choices in vision-system comparison guide.
Scope and budget
Use the bottled water line inspection scope and cost factors to compare bottle views and line interfaces, then scope your actual container and liquid variations.
Testing and handover
In the testing and handover process, agree the visible fill reference separately from net-quantity measurement and foam handling.